Capturing a screenshot on an iPhone lets you save what’s displayed on your screen, from memorable texts to game high scores. Whether you are using the latest model or one that’s been in your pocket for years, Apple has made this process intuitive across its devices. With just a simple combination of buttons or an assistive touch option, You can quickly grab the image and share it with friends or colleagues.
Navigating through the iPhone’s user-friendly interface simplifies saving information instantly without losing any detail visible on my display.
Finding Screenshots in Photos App
When I grab a screenshot, it shows up briefly as a small picture on my phone’s bottom left side. If I want to look at it right away, I just tap that mini-image; or else, if I swipe it off the screen—it’s gone from view but not lost. To check out all the screenshots later on, here’s what works well: dive into the Photos app and hit Albums.
There you’ll see Media Types with an option labeled Screenshots—that place is where they’re neatly stored.
Identifying Your iPhone’s Model
To find out what iPhone model number you have, flip it over. Look for the small text below “iPhone.” You’ll see a model number starting with ‘A’. Remember this number then go to Apple’s website or check settings under General and About; your exact model will be listed there.
This is key because each iPhone has its way of taking screenshots. Knowing your phone’s specific type lets you learn the right buttons to press. It keeps things easy when looking up how-tos online – no guesswork needed!
Plus, if any new method comes along, you’re set to know which instructions match your device.
Using the Side Button Method
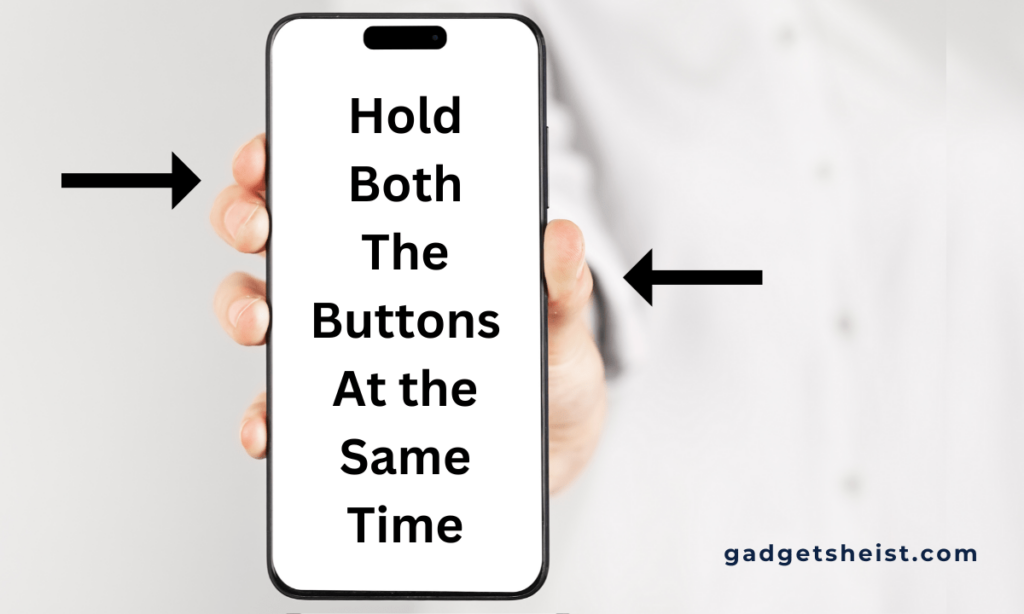
To take a screenshot on your iPhone, you just need to use the side button. Hold it down at the same time as the volume up button; then let go quickly. Your screen will flash, showing that you’ve captured what’s on display.
This simple action works fast and doesn’t require any extra tools or settings changes. It’s built right in for ease of use by anyone with an iPhone model from 6s onwards. You’ll hear a shutter sound if your phone isn’t in silent mode which signals everything went well.
Capturing with AssistiveTouch Feature
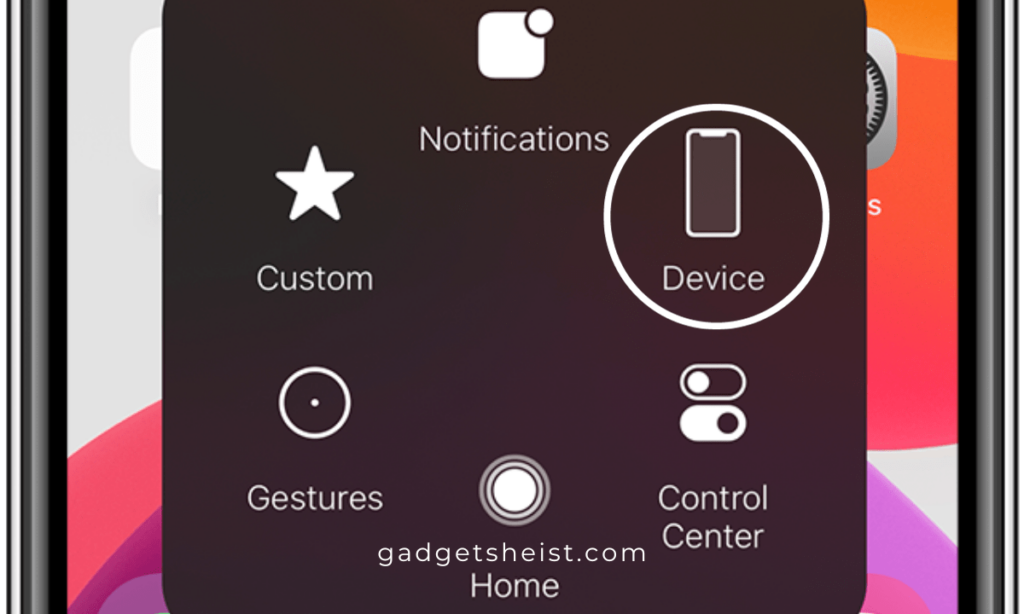
To screenshot with AssistiveTouch, first, make sure it’s on. You find this in settings under accessibility. Once there, tap Touch and then AssistiveTouch to switch it on.
A small circle appears on the screen; that’s your shortcut! Press “Device” within the menu when you touch this icon. Then hit “More” and select “Screenshot” to save the page instantly.
Employing Siri for Screenshots
Want to grab a shot of your screen with Siri? Just tell her “Hey Siri, take a screenshot“. Keep the screen you need on display. This works for iPhone 15 and Pro models alike.
Once done, there’s no missing it—a thumbnail pops up right away! And don’t worry about saving; that’s automatic in your photos app later when looking back at what you captured. Remember this: No buttons are needed here—just use your voice.
Make sure to have those settings tuned for Back Tap actions too if hands-free matters more to you! Share these tips if they help; let’s spread knowledge without hassle or confusion.
Editing and Sharing After Capture
Once you take a screenshot on your iPhone, editing is easy. First, tap the thumbnail that pops up. This brings you to a screen with tools at the bottom.
Here, you can crop or rotate this shot just how you like it – it’s all very user-friendly. Let’s say there are parts of this image you don’t want; use the marker tool to blot them out simply by drawing over them. After making changes and saving them – which happens quickly – sharing is clear-cut too!
There’s a share button right there; press it and pick where your edited screenshot should go: maybe text someone or post online? It works fast for both options.
Utilizing Back Tap Functionality (iOS14+)
In my time with the iPhone, I found a neat trick for snapshots. Called “Back Tap,” it’s in models from the iPhone 8 up to the newest iPhone 12.
Here’s how it works:
Dive into settings and pick “Double Tap” or “Triple Tap.” Pair this choice with taking screenshots from your options or craft one yourself in the Shortcuts app – simple!
Once set, just tap twice on your phone’s back for an instant screenshot. Trust me, when you get used to this little move, capturing anything on-screen becomes second nature—like magic at your fingertips without even a glance!
Capturing a screenshot on an iPhone is quick and simple.
Whether you have the latest model with Face ID or an older version with a Home button, just press the side or top button alongside the volume up or Home button simultaneously. The image saves to my Photos app instantly, allowing me to share moments easily without missing a beat.
For those at Gadgets Heist seeking tech wisdom, mastering this function enhances our digital experience—keeping vital information always at hand.
Related articles
How to Check iPhone Unlock History